Did you notice your walls showing signs of damage?
If so, you can easily refresh your walls with a quick touch-up paint.
Walls tend to get stained or dented over time. Touch-up paint on walls without it showing can cover the damaged areas. The result is that you get to recapture the freshly-painted shine.
Besides, the effort should be flawless without the walls showing any traces of touch-up paint. So, how to do that the right way? Here’s all you should know about touch-up paint on walls so they become shiny again.
What Materials do you need for touch-up paint on the wall?
Before you handle the stained marks or scratches on the walls, make sure that you have all the necessary tools and painting supplies. That way, you can have the best touch-up paint without it showing.
Let’s check out the materials to be used for the purpose.
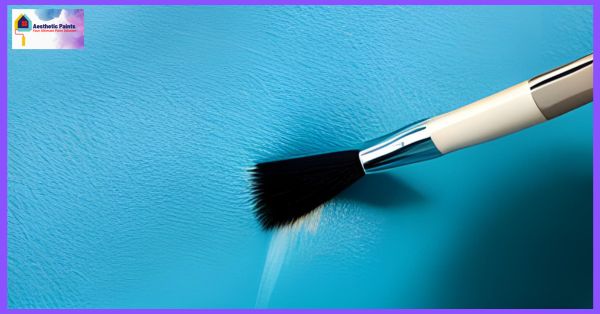
- Paintbrush
- Drop cloth
- Disposable gloves
- Roller
- Putty knife
- Utility knife
- Safety glasses
- Paint tray
- Sandpaper
- Primer
- Printer’s tape
- Paint

Getting started
Use the same paint you used earlier on the walls. While there is no shortage of shades available, choosing the right one could be tricky. Hence, knowing the color shade you need is important to achieve the perfect blend.
How to touch-up paint on your walls?
If you already have the leftover paint for the walls, a touch-up would be easy. Besides, using the right tools and materials will increase your chances of success. Moreover, doing the job properly saves you money that you would have otherwise when hiring a team of experts.
If you have leftover paint, ensure that you stir it well before applying. If you don’t stir the paint well, it could impact its color. Furthermore, check out if the paint is perfect for use or has expired. Mildew growth, an unpleasant smell, and separate layers are signs of expired paint.
Step-1. Prepare the damaged area
You may not need a lot of paint for the touch-up job. Still, you should prevent the nearby areas from getting damaged by the paint. Especially, the surfaces and furniture around the affected area. If possible, you may remove the furniture from the paint zone. Use drop cloth on the surfaces and items to protect them from paint stains.
If the touch-up paint involves correcting the areas along the perimeter of the walls, you will need painter’s tape. A high-quality painter’s tape will help you do the paint job effectively while avoiding unnecessary accidents due to paint spills.
Step-2. Consider repairing the damages
Before getting started with the paint tools, make sure that you have accessed the damaged area properly. There could be holes, cracks, peeled paints, and other kinds of imperfections. Use a putty knife to scrape off the peeled paint.
Next, use sandpaper between 40 and 120 grit to rub the area. Fill the areas with holes and cracks with caulk. This will make sure that you get a clean finish after the paint job. Apply it to the affected area and allow it to sit for some time. When the surface has dried enough, sand it down.
Step-3. Apply primer on the area
You should apply prime on the empty patches so that the area doesn’t create a dull look. Keep in mind that any kind of touch-up paint job greatly benefits from using primer. This becomes important when you have stains or deep marks on the walls.
Primer is a kind of base coat that makes the paint stick to the walls efficiently. Primer delivers the smooth finish that you need. Apply a thin layer of primer with a roller brush. Make sure that you apply the primer in a consistent, even layer to achieve the perfect finish.
Step-4. Using the same paint
Before using the leftover paint, shake the content well before opening it. Or, you can stir it by using a small stick. If you find the paint has thickened over time, use thinner in small amounts. It will dilute the solution making it easy for you to apply the paint.
Using the same paint for the touch-up will help you get the same tone without any visible differences. A difference in sheen won’t help you get the seamless blend you are looking for.
Step-5. Apply the paint
To make the paint job seamless, use the same roller brush, available on Amazon and practice the same method of stroking used earlier. When it comes to touch-ups, using less paint gives you the best results.
Dip the paint roller into the paint and wipe off the excess amounts. Roll the brush into the area while working out gently to get the best blend. If the touch-up area is small, you can use a paintbrush.
Step-6. Allow it to dry
Let the paint dry for some time to attain the smooth finish and aesthetic appearance you need. Although it will take four to five hours to dry, follow the instructions on the paint container. For large areas, it may take about eight to twelve hours.

Step-7. Make the final move
After the area dried out completely, take a closer look to find out if you need further touch-up painting. If you need some, use a small paintbrush, available on Amazon.
Frequently Asked Questions (FAQs)
Can I touch up a newly-painted wall?
Although it’s not a normal instance, you can touch up a newly-painted wall. However, make sure you are using the same paint. Also, apply a small amount of paint by using a small paintbrush or roller.
Can I spray paint?
It may not be a good idea to use spray paint for touch-ups. Chances are that the area will have an uneven finish.
Should I use a roller or a paintbrush?
Use a paint roller when applying the first coat for the touch-up. But if you need touch-ups for the second time after the paint dried, use a small brush instead.
WRAP UP
Sadly, walls with slight damage or discoloration make the room less appealing in terms of aesthetics. However, when you learn how to touch-up walls the right way, it helps you restore the old charm while returning the room to its lost vigor. If you are free this weekend, try out the step mentioned above to get a flawless paint job.